Welcome!

My daughter, Jazlyn, is anaphylactic to egg, dairy, peanuts, and tree nuts. When she was first diagnosed, I found it very difficult to find recipes and foods that didn't taste like "allergy" food. Over the last 15 years I have had a lot of fun developing and changing recipes so that they are safe for her. I love to share my recipes so that other families can realize how yummy "allergy" foods can taste. You don't have to sacrifice taste or your favorite foods, you just have to rethink how to make them. I made a promise to Jazzy that I would do my very best to find a way for her to eat any food she wants to try. So far I have been able to keep that promise. I hope your family enjoys these recipes as much as we do.


Tuesday, August 26, 2014

Homemade Pinata

We make pinatas for my daughters' birthday parties. They are very simple and fun to make, but they are time consuming. Tayana made this fish.


Homemade Pinata

2 cups flour
3 cups water
Balloon blown to size and shape needed
Newspaper, torn into 1" thick strips
Construction paper, torn into pieces
White school glue
String to hang the pinata

Combine the flour and water until it creates a smooth paste. Dip the newspaper strips into the flour mixture, coating completely. Slide the strip between your fingers to remove any excess paste. Place the strips on the balloon until it is covered, leaving a hole at the top just big enough to fit the candy. If you are planning on keeping the pinata as a decoration, you do not need to leave the hole. Allow the balloon dry overnight. Repeat the steps to create a 2nd layer, making sure that you leave the hole at the top. If you would like a stronger pinata, you can repeat the steps to create a 3rd layer, but this is competely optional. When the layers are completely dried, pop and remove the balloon. Dip the construction paper pieces in the glue to coat both sides then smooth the construction paper onto the newspaper. Continue until all of the newspaper is covered. Punch 2 small holes in the top near the opening and string a large piece of ribbon, or thick string through the two holes so that you can hang the pinata. Fill your pinata, through the hole at the top, with the candy, toys and/or any other fun surprises. Cover the opening with more glue covered construction paper pieces.Tie your pinata in the air (or use a broom handle to hold it away from you) with the ribbon and have fun!
* If desired, you can paint your pinata instead of covering it with the construction paper pieces.
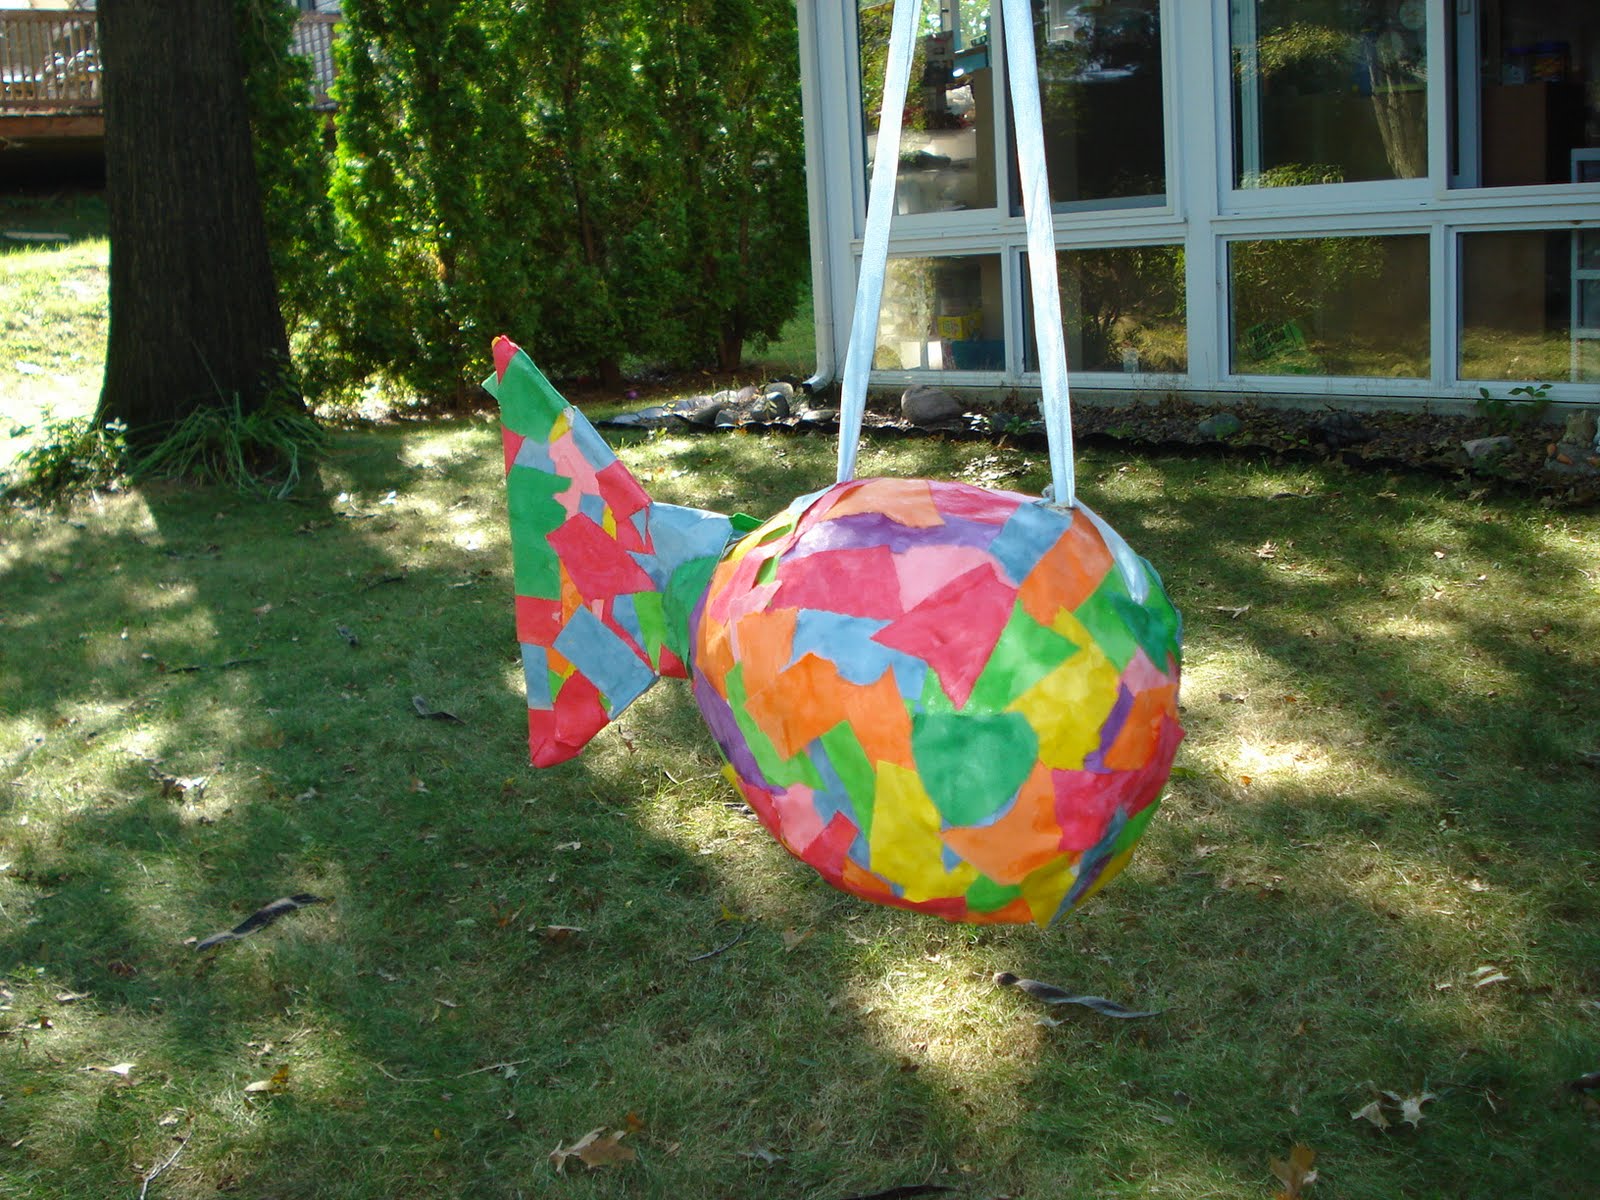
* If you need a shape other than the round or oval shape that balloons create, you can use cardboard. At the beginning, use masking tape connect the cut cardboard to the balloon. When you start covering the balloon with the newspaper strips, wrap them also around and covering the cardboard. For example, to create the fish, we cut a large triangle out of construction paper then taped it to the balloon. For the butterfly we chose to do something different. We used a long balloon for the body then created the wing shape out of the cardboard. However, we did chose to not use the newspaper and paste for the wings. We just covered the cardboard with the construction paper pieces then glued the body to the wings.

Thursday, August 14, 2014

Egg Free, Dairy Free, Nut Free 2 Minute Microwave Chocolate Chip Cookie Cake

I love our 2 Minute Microwave Chocolate Cake so much that I decided to make a 2 Minute Microwave Chocolate Chip Cookie Cake. It had a wonderful flavor and texture. I added a few too many chocolate chips (I know, I didn't realize that was possible either). This recipe is very good, but it is also dangerous since it is so easy and fast to make. Tayana and her friend had fun making them for a sleepover because they are so simple, fast, and yummy. Jazlyn even took one as her dessert for a cookout.


2 Minute Microwave Chocolate Chip Cookie Cake

2 tbsp dairy free margarine
2 tbsp soy milk
1/4 cup brown sugar
2 tsp vanilla extract
1/4 cup flour
1-2 tbsp safe chocolate chips

Place the margarine and soy milk in a microwave safe bowl. Microwave for 35-45 seconds or until the margarine is melted. Stir in the sugar and vanilla. Stir in the flour. Stir in the chocolate chips. Microwave for 2 minutes or until set. Cool for at least 5 minutes before eating.
*  Using sugar in place of the brown sugar does not work well for this recipe. The cookie cake does not rise and the flavor isn't as good.

Sunday, August 3, 2014

Crock Pot Shredded Chicken for Freezing

I always buy my meat in bulk when it is on sale. I cook it up then freeze it in 1 lb bags so that the meals are faster and easier to prepare. This is easiest way to cook a lot of chicken at once. The chicken is very moist, has a good flavor, and shreds very easily. For ideas to use this chicken in, click on the chicken tab on the right of the blog. A few of our favorites are Chicken CroquettesChicken and Dumplings, Chicken and Noodles in White Sauce, Chicken Rice Pie, and Chicken Rice Soup


Crock Pot Shredded Chicken for Freezing

Boneless skinless chicken breasts, fat cut off as much as possible
2 chicken bouillon cubes dissolved in 1 cup water

Place the chicken in the Crock Pot, making sure that the lid still fits securely. The chicken will rise slightly so make sure there is a little room between the chicken and the lid. Pour the bouillon over top. Cover then cook on low for 8-10 hours or on high for 4-5 hours or until the chicken is cooked through and shreds easily.
*  I used 9 pounds of chicken and it was perfect in 9 hours on low.
*  I used 4 1/2 pounds of chicken and it was perfect in 5 hours on high.
*  I measure a little over 1 cup of the chicken into each bag. I also like to spoon some of the broth into the bag before sealing it.
*  Feel free to use plain water if you want to cut down on the sodium.
*  Great for soups, casseroles, chicken croquettes, BBQ chicken sandwiches, chicken and dumpling, or anywhere you would use cooked diced or shredded chicken.