Welcome!

My daughter, Jazlyn, is anaphylactic to egg, dairy, peanuts, and tree nuts. When she was first diagnosed, I found it very difficult to find recipes and foods that didn't taste like "allergy" food. Over the last 15 years I have had a lot of fun developing and changing recipes so that they are safe for her. I love to share my recipes so that other families can realize how yummy "allergy" foods can taste. You don't have to sacrifice taste or your favorite foods, you just have to rethink how to make them. I made a promise to Jazzy that I would do my very best to find a way for her to eat any food she wants to try. So far I have been able to keep that promise. I hope your family enjoys these recipes as much as we do.


Showing posts with label birthday. Show all posts

Tuesday, August 26, 2014

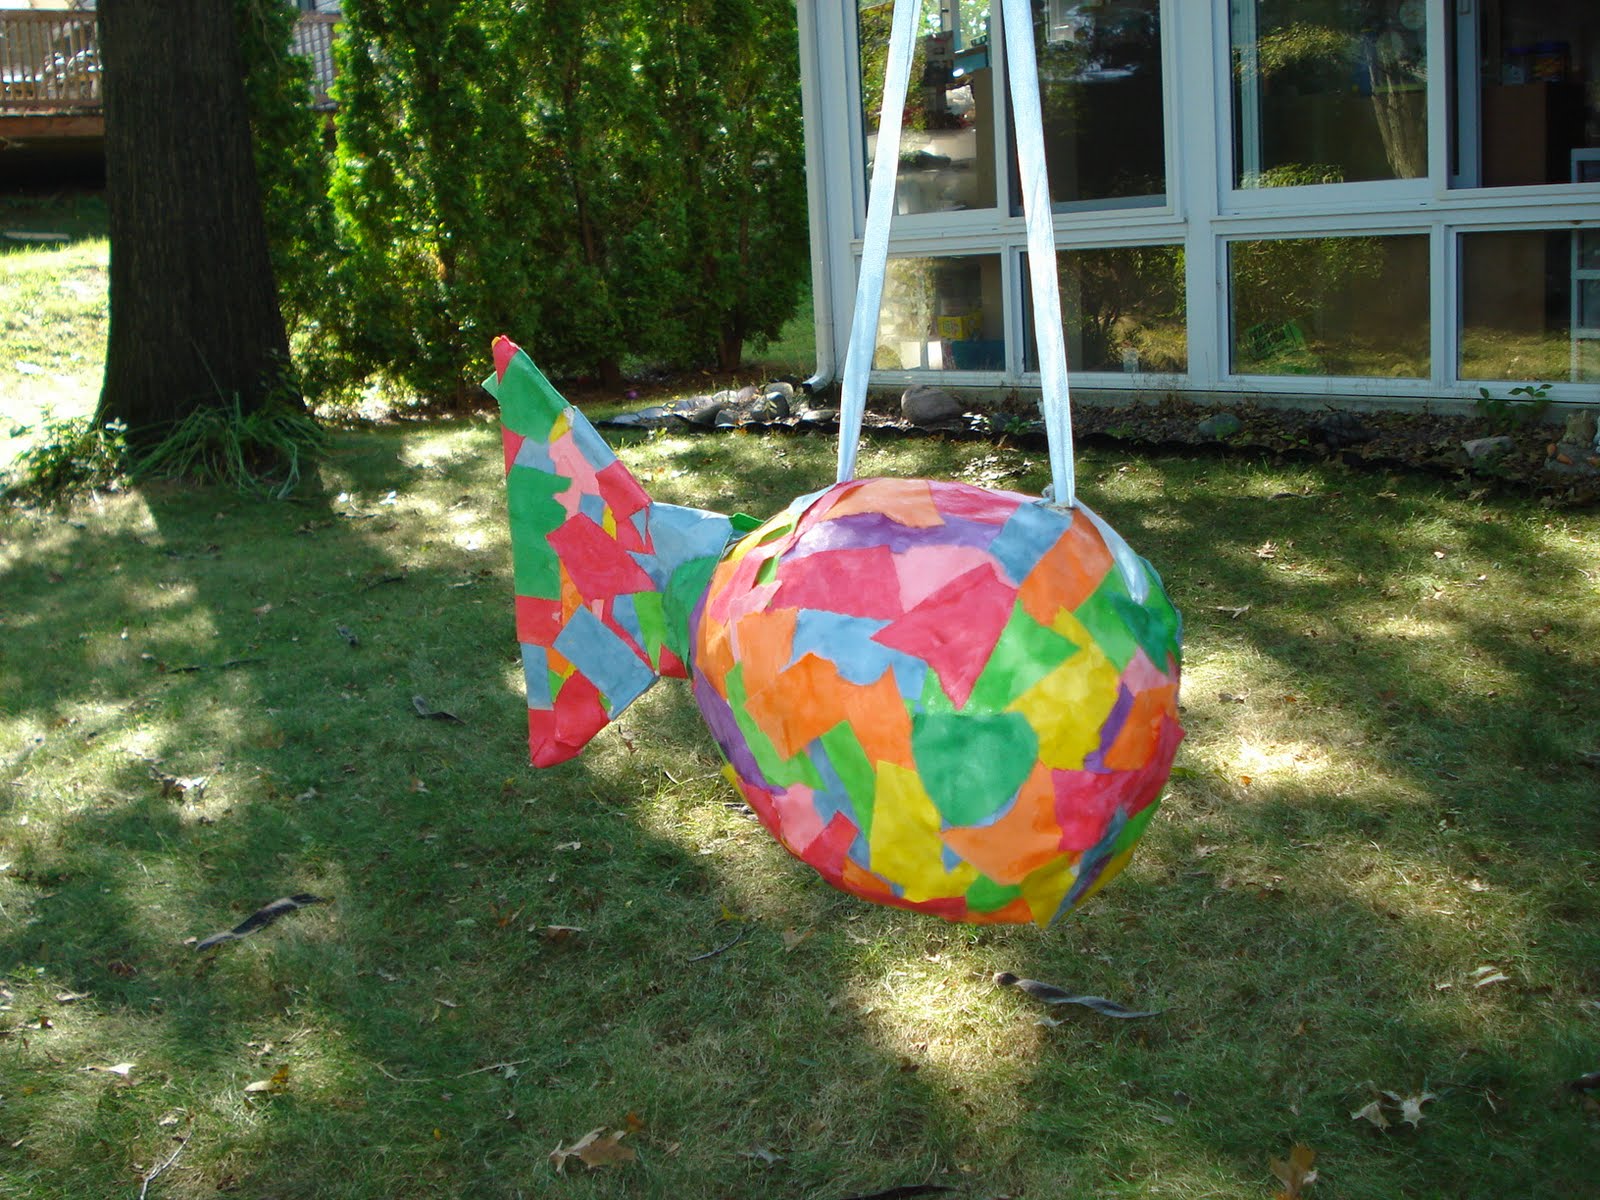
Homemade Pinata

We make pinatas for my daughters' birthday parties. They are very simple and fun to make, but they are time consuming. Tayana made this fish.


Homemade Pinata

2 cups flour
3 cups water
Balloon blown to size and shape needed
Newspaper, torn into 1" thick strips
Construction paper, torn into pieces
White school glue
String to hang the pinata

Combine the flour and water until it creates a smooth paste. Dip the newspaper strips into the flour mixture, coating completely. Slide the strip between your fingers to remove any excess paste. Place the strips on the balloon until it is covered, leaving a hole at the top just big enough to fit the candy. If you are planning on keeping the pinata as a decoration, you do not need to leave the hole. Allow the balloon dry overnight. Repeat the steps to create a 2nd layer, making sure that you leave the hole at the top. If you would like a stronger pinata, you can repeat the steps to create a 3rd layer, but this is competely optional. When the layers are completely dried, pop and remove the balloon. Dip the construction paper pieces in the glue to coat both sides then smooth the construction paper onto the newspaper. Continue until all of the newspaper is covered. Punch 2 small holes in the top near the opening and string a large piece of ribbon, or thick string through the two holes so that you can hang the pinata. Fill your pinata, through the hole at the top, with the candy, toys and/or any other fun surprises. Cover the opening with more glue covered construction paper pieces.Tie your pinata in the air (or use a broom handle to hold it away from you) with the ribbon and have fun!
* If desired, you can paint your pinata instead of covering it with the construction paper pieces.
* If you need a shape other than the round or oval shape that balloons create, you can use cardboard. At the beginning, use masking tape connect the cut cardboard to the balloon. When you start covering the balloon with the newspaper strips, wrap them also around and covering the cardboard. For example, to create the fish, we cut a large triangle out of construction paper then taped it to the balloon. For the butterfly we chose to do something different. We used a long balloon for the body then created the wing shape out of the cardboard. However, we did chose to not use the newspaper and paste for the wings. We just covered the cardboard with the construction paper pieces then glued the body to the wings.

Monday, October 18, 2010

Egg Free, Dairy Free, Nut Free Giant Chocolate Chip Cookie

We were at the mall the other day and Jazlyn saw the "celebration" giant chocolate chip cookies. She really like them and wanted to have one for her birthday party. I told her that we would try to make a practice one first and see how it turned out. The result is a moist, yummy, really fun cookie. Jazlyn was so happy and is excited to decorate one for her birthday party. Here are pictures of our "test cookie".

The bottom picture is the cookie cake that we made for Maleah's 6th birthday party.


Giant Chocolate Chip Cookie

1 cup dairy free margarine
3/4 cup sugar
3/4 cup brown sugar
2 tsp vanilla extract
1/2 cup unsweetened applesauce
3 cups flour
1/2 tsp salt
2 tsp baking soda
2 cups safe chocolate chips

Use an electric mixer to cream the margarine, sugar, brown sugar and vanilla. Add the applesauce then beat again. In a separate bowl, combine the flour, salt and baking soda. Add the flour mixture to the margarine mixture then beat until thoroughly combined. Fold in the chocolate chips. Spread the dough evenly into a sprayed 15” round pizza pan, leaving a 1 1/2" border between the dough and pan to allow room for the cookie to expand. Bake at 375 for 23-27 minutes. Cool in the pan. Decorate as desired.
* You can also bake this cookie in two 9” pie pans for 17-19 minutes.
* Cover the rack of the stove with foil first if you are worried about the cookie spilling over. I did this preventatively, but my cookie did not spill over the rim of the pan.

Wednesday, July 7, 2010

Egg Free, Dairy Free, Nut Free Simple Banana Ice Cream

Jazlyn has been on a banana kick lately and when I asked her what ice cream she would like me to make for her cousin's birthday party, of course she said banana. I came up with this recipe and we were so pleased because it is so creamy and delicious. It's also a great way to use up leftover bananas. The 1st picture is soft serve right out of the ice cream maker and the 2nd picture is after being frozen for a day.


Simple Banana Ice Cream

2 cups soy milk
1/2 cup sugar
2 tsp vanilla extract
Pinch salt
3 ripe bananas, sliced

Puree all of the ingredients in the blender. Transfer to the ice cream maker and process according to the manufacturer's directions.

Friday, May 28, 2010

Egg Free, Dairy Free, Nut Free Amazing Vanilla Cupcakes with Variations

These vanilla cupcakes are incredibly moist and perfect.

Each year when Jazzy's Epi-Pen expires, we throw her an Epi-Pen party. She gets to pick the meal, dessert and what we do that evening. For her dessert, she chose these vanilla cupcakes with coconut and chocolate chips added. They turned out so good that she didn't want frosting. We especially love the mini version because they are easily portable and no matter which variation we make (even plain), they are so good that we don't need to add frosting.

Tayana wanted rainbow cupcakes with rainbow frosting and sprinkles for her birthday party. She had so much fun making and decorating them.

We used this recipe to make the vanilla cake for a Jell-O Poke Cake. Please note that the cupcakes turn out much fluffier than the cake. The cake has a very good flavor, but the texture is more dense. It worked great for the Jell-O Poke Cake and for the Pudding Poke Cake.


Amazing Vanilla Cupcakes with Variations

1 tbsp vinegar
1 1/2 cups soy milk
2 1/8 cups flour
2 tsp baking powder
1/2 tsp baking soda
1/2 tsp salt
1 1/8 cups sugar
1/2 cup oil
2 tsp vanilla extract

In a small bowl, combine the vinegar and soy milk and set aside (the mixture will thicken and curdle slightly). In a separate bowl, combine the flour, baking powder, baking soda, salt and sugar. In a separate bowl, combine the soy milk mixture, oil and vanilla. Add the oil mixture to the flour mixture. Beat with an electric mixer until smooth. Fill lined muffin cups 3/4 full with the batter. Bake at 350 for 15 minutes or until a toothpick inserted in the center comes out clean. Allow the cupcakes to cool completely before frosting.
*  If using mini muffin cups, bake for 10 minutes or until a toothpick inserted in the center comes out clean.
*  Makes about 18 cupcakes. I like to make 12 full-sized cupcakes and 24 mini cupcakes.
*  This recipe is very versatile. Some of our favorite variations include adding food coloring, chocolate chips, coconut, sprinkles, pureed strawberries, etc.
*  You can also make an 8x11 cake, simply increase the baking time to 25-35 minutes or until a toothpick inserted in the center comes out clean.

Saturday, March 20, 2010

Egg Free, Dairy Free, Nut Free All-Time Favorite Chocolate Cake

This is the only cake recipe we use for our birthday cakes. The taste is delicious and it is a very easy cake to cut and use to make beautiful cakes. This recipe also make perfect mini cupcakes. We like them plain with safe chocolate chips stirred in and also frosted with sprinkles.


All-Time Favorite Chocolate Cake

1 1/2 cup flour
3 tbsp cocoa powder
1 tsp baking soda
1 cup sugar
1/2 tsp salt
5 tbsp oil
1 tbsp vinegar
1 tsp vanilla extract
1 cup cold water

Combine the flour, cocoa, baking soda, sugar and salt . Make 3 grooves in dry mix. Pour oil in one groove,
vinegar in another and vanilla in the last one. Pour the cold water over everything. Beat with a spoon until nearly smooth and the flour disappears. Pour the batter into a sprayed 9" square baking pan. Bake at 350 for 30 minutes or until a toothpick inserted in the center comes out clean. Cool completely before frosting.
* A single batch makes one 9" square cake or one round cake. A single batch also will make 12 cupcakes. A double recipe is perfect for a 9x13 cake. You may need to vary the baking time based on the pan you use. For example, my cupcakes bake in 20 minutes.
* This cake freezes really well. I just wrap it individually and then defrost in microwave or on the counter if frosted.
* We also love stir safe chocolate chips into the batter then spoon the batter into lined mini muffin cups and bake for 10 minutes. It should make about 48-60 mini cupcakes. These are also great without the chocolate chips.