Since it's Christmastime again, I thought I would do a post of our favorite Christmas cookies. Each year we like to try a few new varieties, but we also have our favorites that we make throughout the year and especially at Christmas. Since my girls love to bake, we like to make one or two different kinds each week starting after Thanksgiving. We eat some of them fresh, then I place the rest of the batch in Ziploc bags and place them in the freezer. They stay yummy but they aren't all eaten at once and we can enjoy them longer. My grandmother always had a freezer full of cookies for us, now my girls have them too. Plus, it is easier for me to resist them in the freezer. I guess it's out of sight out of mind. I also do this with unfrosted cupcakes so that Jazlyn always has a dessert for birthdays, get-togethers, or just because.
Our Cut Out Sugar Cookies must be made each Christmas because the girls look forward to cutting them out and decorating them. Plus, they know since they are more work they don't get them as often. If you ask the girls, they would say that this is their favorite cookie.
The Chocolate Fingers are another requested cookie. Again, they are more work, but the girls love them so much.
Daddy's Favorite Cinnamon Cookies. The name says it all. My husband isn't a big sweets person, but he loves these cookies.
My husband and I love the Perfect Chocolate Chip Cookies. They are crispy on the outside with a slightly chewy center.
The girls love the cookies above, but they also love the Simply Amazing Chocolate Chip Cookies because they like rolling them in the sprinkles and they like the soft texture.
The Chocolaty Chocolate Chip Cookies are perfect when you need chocolate.
The Sunbutter Chocolate Chip Oat Cookies are my dad's favorite cookies. I love the different flavor that the Sunbutter gives them. I also like the texture of the oats for something different.
The Soft Drop Sugar Cookies are wonderful because they have a cakey texture and provide a different kind of cookie.
These Chocolate Drop Sugar Cookies are a yummy change to the traditional sugar cookie.
Simple and delicious egg free, dairy free and nut free recipes that everyone will love.
Welcome!
My daughter, Jazlyn, is anaphylactic to egg, dairy, peanuts, and tree nuts. When she was first diagnosed, I found it very difficult to find recipes and foods that didn't taste like "allergy" food. Over the last 15 years I have had a lot of fun developing and changing recipes so that they are safe for her. I love to share my recipes so that other families can realize how yummy "allergy" foods can taste. You don't have to sacrifice taste or your favorite foods, you just have to rethink how to make them. I made a promise to Jazzy that I would do my very best to find a way for her to eat any food she wants to try. So far I have been able to keep that promise. I hope your family enjoys these recipes as much as we do.
Saturday, December 20, 2014
Tuesday, December 9, 2014
Welcome to Holland
This beautiful poem was shared with me shortly after Jazlyn's life threatening food allergies were diagnosed. When I am feeling down about Jazlyn's allergies, I turn to it to remind me to enjoy this parenting journey no matter what that journey is. In fact, I feel like our lives have been enriched because of the allergies. I don't know if we would have chosen homeschooling. That decision alone changed the entire course of our family. Even if her allergies disappeared today, I would still choose homeschooling. I love having my girls with me, I love watching them learn, and we created so many memories through the field trips. Without the allergies, we also wouldn't have met some amazing friends and we wouldn't have as many memories in the kitchen. I love cooking and baking with my girls. I love coming up with new recipes to give Jazlyn lots of yummy foods. Does it get difficult? Yes! However, I love our family and our life together.
c1987 by Emily Perl Kingsley. All rights reserved
I am often asked to describe the experience of raising a child with a disability - to try to help people who have not shared that unique experience to understand it, to imagine how it would feel. It's like this......
When you're going to have a baby, it's like planning a fabulous vacation trip - to Italy. You buy a bunch of guide books and make your wonderful plans. The Coliseum. The Michelangelo David. The gondolas in Venice. You may learn some handy phrases in Italian. It's all very exciting.
After months of eager anticipation, the day finally arrives. You pack your bags and off you go. Several hours later, the plane lands. The stewardess comes in and says, "Welcome to Holland."
"Holland?!?" you say. "What do you mean Holland?? I signed up for Italy! I'm supposed to be in Italy. All my life I've dreamed of going to Italy."
But there's been a change in the flight plan. They've landed in Holland and there you must stay.
The important thing is that they haven't taken you to a horrible, disgusting, filthy place, full of pestilence, famine and disease. It's just a different place.
So you must go out and buy new guide books. And you must learn a whole new language. And you will meet a whole new group of people you would never have met.
It's just a different place. It's slower-paced than Italy, less flashy than Italy. But after you've been there for a while and you catch your breath, you look around.... and you begin to notice that Holland has windmills....and Holland has tulips. Holland even has Rembrandts.
But everyone you know is busy coming and going from Italy... and they're all bragging about what a wonderful time they had there. And for the rest of your life, you will say "Yes, that's where I was supposed to go. That's what I had planned."
And the pain of that will never, ever, ever, ever go away... because the loss of that dream is a very very significant loss.
But... if you spend your life mourning the fact that you didn't get to Italy, you may never be free to enjoy the very special, the very lovely things ... about Holland.
WELCOME TO HOLLAND
by
Emily Perl Kingsley.
I am often asked to describe the experience of raising a child with a disability - to try to help people who have not shared that unique experience to understand it, to imagine how it would feel. It's like this......
When you're going to have a baby, it's like planning a fabulous vacation trip - to Italy. You buy a bunch of guide books and make your wonderful plans. The Coliseum. The Michelangelo David. The gondolas in Venice. You may learn some handy phrases in Italian. It's all very exciting.
After months of eager anticipation, the day finally arrives. You pack your bags and off you go. Several hours later, the plane lands. The stewardess comes in and says, "Welcome to Holland."
"Holland?!?" you say. "What do you mean Holland?? I signed up for Italy! I'm supposed to be in Italy. All my life I've dreamed of going to Italy."
But there's been a change in the flight plan. They've landed in Holland and there you must stay.
The important thing is that they haven't taken you to a horrible, disgusting, filthy place, full of pestilence, famine and disease. It's just a different place.
So you must go out and buy new guide books. And you must learn a whole new language. And you will meet a whole new group of people you would never have met.
It's just a different place. It's slower-paced than Italy, less flashy than Italy. But after you've been there for a while and you catch your breath, you look around.... and you begin to notice that Holland has windmills....and Holland has tulips. Holland even has Rembrandts.
But everyone you know is busy coming and going from Italy... and they're all bragging about what a wonderful time they had there. And for the rest of your life, you will say "Yes, that's where I was supposed to go. That's what I had planned."
And the pain of that will never, ever, ever, ever go away... because the loss of that dream is a very very significant loss.
But... if you spend your life mourning the fact that you didn't get to Italy, you may never be free to enjoy the very special, the very lovely things ... about Holland.
Egg Free, Dairy Free Creamy Sausage and Rice
This is a creamy, simple casserole.
Creamy Sausage and Rice
1/4 cup dairy free margarine
1/4 cup flour
2 cups soy milk
1 pound sausage, casings removed and browned like ground beef
2 cups uncooked instant rice, cooked
Melt the margarine in a large saucepan over medium heat. Add the flour then whisk until completely moistened. Slowly add the soy milk, whisking constantly, until combined and the sauce has thickened. Add the sausage and rice. Cook and stir until heated through and thoroughly combined.
* If you would like this casserole a little crispier on the top and bottom, you can place all of the ingredients in a sprayed 9x13 baking dish then bake at 375 for 30 minutes.
* A can of peas or corn can be added to the casserole if desired.
Saturday, November 29, 2014
Egg Free, Dairy Free Quick and Simple Chicken and Vegetables over Biscuits
This meal was very easy to make since I always keep cooked shredded chicken in the freezer ready to use (my favorite is our Crock Pot Shredded Chicken). The girls loved this meal served over the Flattened Drop Biscuits.
Quick and Simple Chicken and Vegetables
1 lb cooked and diced or shredded chicken or turkey
2 cans mixed vegetables
1 can turkey gravy
Combine all of the ingredients and then heat until warmed through. Serve over warm biscuits if desired.
.
Quick and Simple Chicken and Vegetables
1 lb cooked and diced or shredded chicken or turkey
2 cans mixed vegetables
1 can turkey gravy
Combine all of the ingredients and then heat until warmed through. Serve over warm biscuits if desired.
.
Labels:
allergy,
biscuits,
casserole,
chicken,
chicken and vegetables,
dairy free,
egg free,
nut free,
quick,
recipe,
simple,
supper,
vegetables
Sunday, November 16, 2014
Egg Free, Dairy Free Simple Chicken and Rice a Roni Bake
This meal is so fast to put together and bakes into a yummy casserole. The chicken is moist and flavorful and the rice is tender and perfect. Baking the casserole this way tastes so much better than just cooking the chicken and Rice a Roni separately. The bottom picture was made with cooked ground sausage and peas in place of the chicken and corn.
Simple Chicken and Rice a Roni Bake
2 boxes chicken Rice a Roni
4 cups water
1 can turkey gravy
1 can corn or peas
2 lbs boneless skinless chicken breasts
Combine the Rice a Roni, water, gravy, and corn in a sprayed 11x15 baking dish. Place the chicken on top of the mixture. Cover with foil then bake at 375 for 1 hour or until the chicken is cooked through.
* If desired, the raw chicken can be replaced with 1 lb of cooked meat such as diced or shredded chicken, ground beef, ground sausage, sliced sausage, ham, etc. The rest of the recipe stays the same.
Labels:
allergy,
casserole,
chicken,
chicken and rice a roni bake,
dairy free,
egg free,
nut free,
recipe,
rice a roni,
supper
Thursday, October 23, 2014
Egg Free, Dairy Free, Nut Free Rhubarb Oat Crisp Cobbler
My brother gave me some rhubarb so I decided to try something new with it. I loved the slightly tart bottom and the amazing topping. The oat topping has a wonderful flavor and perfect textured top that is a cross between a crisp and a cobbler.
Rhubarb Oat Crisp Cobbler
Rhubarb Mixture
4 cups rhubarb, cut into 1" pieces
3/4 - 1 cup sugar, depending how tart or sweet you want your rhubarb
1/4 cup flour
1 tsp cinnamon
Oat Topping
1 cup flour
1 cup brown sugar
1 cup oats
1/2 cup dairy free margarine, melted
1 1/2 tsp vanilla extract
Combine all ingredients for the rhubarb mixture. Transfer the mixture evenly into an 8x8 baking dish. In a separate bowl, combine all of the ingredients for the oat topping. Spread the mixture evenly over top of the rhubarb. Bake at 375 for 35 minutes or until the rhubarb is tender and the topping is golden.
Labels:
allergy,
cobbler,
crisp,
dairy free,
dessert,
egg free,
nut free,
oats,
recipe,
rhubarb,
rhubarb cobbler,
rhubarb crisp,
rhubarb oat crisp cobbler
Thursday, October 2, 2014
Egg Free, Dairy Free Flattened Drop Biscuits
These biscuits are perfect for topping with chicken and vegetables, creamed sausage, chili, etc.
Flattened Drop Biscuits
2 1/4 cups all purpose baking mix (I use Bisquick)
1 1/4 cups soy milk
Thoroughly combine both of the ingredients. This batter will be thin and spread when dropped by spoonfuls onto a sprayed foil lined baking sheet. Bake at 450 for 10-12 minutes or until lightly golden.
* This recipe makes about 16-18 biscuits, depending on the size you make them. However, you can easily double or triple this recipe.
Sunday, September 21, 2014
Egg Free, Dairy Free, Nut Free No Bake Sunbutter Oatmeal Balls
We love our No Bake Sunbutter Cheerio Balls, but we wanted to try something with oats instead. These Sunbutter Oatmeal Balls are very simple to make and are a yummy, healthy treat. We prefer them refrigerated, but they are also very good eaten right away. You can omit the powdered sugar coating if you prefer. If desired, you can stir in some safe chocolate chips, raisins, craisins, flaked coconut, or anything that sounds good to you. We decided to make this batch plain.
No Bake Sunbutter Oatmeal Balls
1 cup instant oats
1/2 cup oat flour (I blended 1/2 cup instant oats in the blender)
1/2 cup corn syrup or honey
1/2 cup Sunbutter
1/4 - 1/2 cup safe chocolate chips, raisins, craisins, flaked coconut, etc. - optional
Confectioner's sugar for rolling - optional
Thoroughly combine all of the ingredients except for the confectioner's sugar. Roll the mixture into bite-sized balls. Coat with confectioner's sugar if desired. Serve immediately or refrigerate until ready to eat.
Monday, September 8, 2014
Egg Free, Dairy Free Microwave Baked Acorn Squash
A friend gave me some acorn squash. This is a simple way to prepare it that takes only 10 minutes. I love the brown sugar flavor with the squash.
Microwave Baked Acorn Squash
1 acorn squash, cut in half and seeds removed
2 tbsp brown sugar
1 tbsp dairy free margarine
Place the squash, cut side up in a microwave safe dish. Cover with wax paper or plastic wrap then microwave for 7 minutes. Fill the center of the squash with the brown sugar and margarine. Cover then microwave an additional 3 minutes or until tender.
* As an alternative, you can microwave for 10 minutes or until tender. Then remove all of the squash from the shell. Smash it with the brown sugar and margarine. This is the version that my daughters like the most.
Tuesday, August 26, 2014
Homemade Pinata
We make pinatas for my daughters' birthday parties. They are very simple and fun to make, but they are time consuming. Tayana made this fish.
Homemade Pinata
2 cups flour
3 cups water
Balloon blown to size and shape needed
Newspaper, torn into 1" thick strips
Construction paper, torn into pieces
White school glue
String to hang the pinata
Combine the flour and water until it creates a smooth paste. Dip the newspaper strips into the flour mixture, coating completely. Slide the strip between your fingers to remove any excess paste. Place the strips on the balloon until it is covered, leaving a hole at the top just big enough to fit the candy. If you are planning on keeping the pinata as a decoration, you do not need to leave the hole. Allow the balloon dry overnight. Repeat the steps to create a 2nd layer, making sure that you leave the hole at the top. If you would like a stronger pinata, you can repeat the steps to create a 3rd layer, but this is competely optional. When the layers are completely dried, pop and remove the balloon. Dip the construction paper pieces in the glue to coat both sides then smooth the construction paper onto the newspaper. Continue until all of the newspaper is covered. Punch 2 small holes in the top near the opening and string a large piece of ribbon, or thick string through the two holes so that you can hang the pinata. Fill your pinata, through the hole at the top, with the candy, toys and/or any other fun surprises. Cover the opening with more glue covered construction paper pieces.Tie your pinata in the air (or use a broom handle to hold it away from you) with the ribbon and have fun!
* If desired, you can paint your pinata instead of covering it with the construction paper pieces.
* If you need a shape other than the round or oval shape that balloons create, you can use cardboard. At the beginning, use masking tape connect the cut cardboard to the balloon. When you start covering the balloon with the newspaper strips, wrap them also around and covering the cardboard. For example, to create the fish, we cut a large triangle out of construction paper then taped it to the balloon. For the butterfly we chose to do something different. We used a long balloon for the body then created the wing shape out of the cardboard. However, we did chose to not use the newspaper and paste for the wings. We just covered the cardboard with the construction paper pieces then glued the body to the wings.
Labels:
birthday,
craft,
dairy free,
egg free,
homemade piñata,
nut free,
piñata
Thursday, August 14, 2014
Egg Free, Dairy Free, Nut Free 2 Minute Microwave Chocolate Chip Cookie Cake
I love our 2 Minute Microwave Chocolate Cake so much that I decided to make a 2 Minute Microwave Chocolate Chip Cookie Cake. It had a wonderful flavor and texture. I added a few too many chocolate chips (I know, I didn't realize that was possible either). This recipe is very good, but it is also dangerous since it is so easy and fast to make. Tayana and her friend had fun making them for a sleepover because they are so simple, fast, and yummy. Jazlyn even took one as her dessert for a cookout.
2 Minute Microwave Chocolate Chip Cookie Cake
2 tbsp dairy free margarine
2 tbsp soy milk
1/4 cup brown sugar
2 tsp vanilla extract
1/4 cup flour
1-2 tbsp safe chocolate chips
Place the margarine and soy milk in a microwave safe bowl. Microwave for 35-45 seconds or until the margarine is melted. Stir in the sugar and vanilla. Stir in the flour. Stir in the chocolate chips. Microwave for 2 minutes or until set. Cool for at least 5 minutes before eating.
* Using sugar in place of the brown sugar does not work well for this recipe. The cookie cake does not rise and the flavor isn't as good.
Sunday, August 3, 2014
Crock Pot Shredded Chicken for Freezing
I always buy my meat in bulk when it is on sale. I cook it up then freeze it in 1 lb bags so that the meals are faster and easier to prepare. This is easiest way to cook a lot of chicken at once. The chicken is very moist, has a good flavor, and shreds very easily. For ideas to use this chicken in, click on the chicken tab on the right of the blog. A few of our favorites are Chicken Croquettes, Chicken and Dumplings, Chicken and Noodles in White Sauce, Chicken Rice Pie, and Chicken Rice Soup.
Crock Pot Shredded Chicken for Freezing
Boneless skinless chicken breasts, fat cut off as much as possible
2 chicken bouillon cubes dissolved in 1 cup water
Place the chicken in the Crock Pot, making sure that the lid still fits securely. The chicken will rise slightly so make sure there is a little room between the chicken and the lid. Pour the bouillon over top. Cover then cook on low for 8-10 hours or on high for 4-5 hours or until the chicken is cooked through and shreds easily.
* I used 9 pounds of chicken and it was perfect in 9 hours on low.
* I used 4 1/2 pounds of chicken and it was perfect in 5 hours on high.
* I measure a little over 1 cup of the chicken into each bag. I also like to spoon some of the broth into the bag before sealing it.
* Feel free to use plain water if you want to cut down on the sodium.
* Great for soups, casseroles, chicken croquettes, BBQ chicken sandwiches, chicken and dumpling, or anywhere you would use cooked diced or shredded chicken.
Thursday, July 24, 2014
Egg Free, Dairy Free Crock Pot Green Bean Casserole
I love green bean casserole. My sister-in-law made it in the crock pot for Thanksgiving and inspired me to make a safe version for Jazlyn. Everyone loved it, even my husband who isn't a big veggie eater. I froze the leftovers and they reheated great.
Crock Pot Green Bean Casserole
32 oz bag frozen green beans
1 can golden mushroom soup
1 can mushroom gravy
2/3 cup soy milk
1/2 tsp salt
1/2 tsp pepper
2.8 oz package fried onions, divided use
Combine all of the ingredients except for 1/2 of the onions. Cover then cook on low for 5-6 hours. Pour the remaining onions over the top then serve.
* You can use 2 cans of golden mushroom soup or 2 cans of mushroom gravy.
* If you want the sauce thicker, you can use only 1/3 cup soy milk.
Labels:
allergy,
casserole,
crock pot,
crock pot green bean casserole,
dairy free,
egg free,
green bean,
nut free,
recipe,
side dish,
supper
Sunday, July 13, 2014
Egg Free, Dairy Free, Nut Free Jazzy Duds (mock Milk Duds)
This candy came about in a bit of a strange way. I was making Baked Caramel Corn and inadvertently left some of the delicious caramel behind in the pot. I scooped it out of the pan then dropped it onto a plate. I noticed that I could roll and shape the caramel. I rolled it into small balls then coated them with safe melted chocolate. Jazlyn was so happy to have her very own Milk Duds. Her two sisters couldn't believe how much they tasted like the real thing. Now they want me to make a batch of the caramel just to turn them into this candy since I could only make 5 of them last time.
Jazzy Duds (mock Milk Duds)
1 cup dairy-free margarine
2 cups brown sugar
1/2 cup corn syrup
1 tsp salt
1/2 tsp baking soda
2 tsp vanilla extract
1-2 cups safe chocolate chips, melted
In a medium saucepan, melt the margarine, brown sugar, corn syrup and salt. Heat the mixture to a boil, stirring constantly. Boil without stirring for 5 minutes. Remove from heat and stir in the baking soda and vanilla extract. Allow the caramel to cool enough for you to handle it and so it will hold together. Roll the caramel into small balls then place them on a wax paper lined baking sheet until set. Coat the caramel in the chocolate then place them back on the baking sheet. Refrigerate until the chocolate is set. Store tightly covered in the fridge.
* This makes a lot of candy. Feel free to cut the recipe in half.
Labels:
allergy,
candy,
dairy free,
dessert,
egg free,
Jazzy Duds,
Milk Duds,
mock milk duds,
nut free,
recipe
Thursday, July 3, 2014
Egg Free, Dairy Free Simple Meat and Noodle Bake
This recipe is very simple because the noodles are not cooked before baking them. They will bake in the sauce and have a wonderful flavor. Mix and match different meats, vegetable, and pasta shapes for a variety of meals.
Simple Meat and Noodle Bake
1 lb cooked ground beef, cooked diced chicken, turkey, ham, or Polska Kielbasa
1 box noodles, any shape desired, uncooked
1 can creamed corn
1 can vegetables desired such as peas, corn, green beans, mixed vegetables
1 can gravy
1 1/2 cans soy milk, divided use
Combine all of the ingredients except for the 1/2 cup of soy milk. Pour into a sprayed 9x13 baking dish. Pour the remaining 1/2 can of soy milk over top but do not stir. Press down the mixture if needed to be covered with the milk. Use a little additional soy milk if needed. Cover tightly with foil
then bake at 450 for 45 minutes or until the noodles are tender.
Labels:
allergy,
casserole,
chicken,
creamed corn,
dairy free,
egg free,
gravy,
ground beef,
ham,
noodles,
nut free,
peas,
polska kielbasa,
recipe,
sausage,
simple meat and noodle bake,
supper,
turkey,
uncooked noodles
Monday, June 23, 2014
Egg Free, Dairy Free Crock Pot Scalloped Potatoes with Ham
Another wonderful crockpot recipe. We love our oven baked ham and scalloped potatoes but I wanted to make a crock pot version. This recipe is just as good but made simple with the crockpot.
Crockpot Scalloped Potatoes with Ham
3 tbsp dairy free margarine
1/3 cup flour
1/2 tsp salt
1/2 tsp pepper
2 cups soy milk
7-9 potatoes, thinly sliced
1 lb diced cooked ham
Melt the margarine in a saucepan. Whisk in the flour, salt, and pepper. Add the soy milk and whisk until thickened. Add the potatoes and ham then mix until thoroughly combined. Pour the mixture into the sprayed crock pot. Cook on low for 7 hours or on high for 4 hours.
* Feel free to omit the cooked ham if your are having this meal as a side dish.
* You can add a can of peas, corn, green beans, etc. if you desire.
Monday, June 16, 2014
Egg Free, Dairy Free Crock Pot Turkey and Rice
My girls love anything with rice. This recipe is simple and yummy.
Crock Pot Turkey and Rice
2 cans turkey gravy
3 cups chicken broth
3 cups instant rice
1 lb cooked and diced or shredded turkey or chicken
1 can mixed vegetables OR 1 cup frozen peas and 1 cup frozen corn
Combine all of the ingredients in the sprayed crockpot. Cover and cook on low for 3-4 hours.
Crock Pot Turkey and Rice
2 cans turkey gravy
3 cups chicken broth
3 cups instant rice
1 lb cooked and diced or shredded turkey or chicken
1 can mixed vegetables OR 1 cup frozen peas and 1 cup frozen corn
Combine all of the ingredients in the sprayed crockpot. Cover and cook on low for 3-4 hours.
Labels:
allergy,
casserole,
chicken,
crock pot,
crockpot,
crockpot turkey and rice,
dairy free,
egg free,
mixed vegetables,
nut free,
recipe,
rice,
supper,
turkey
Saturday, June 7, 2014
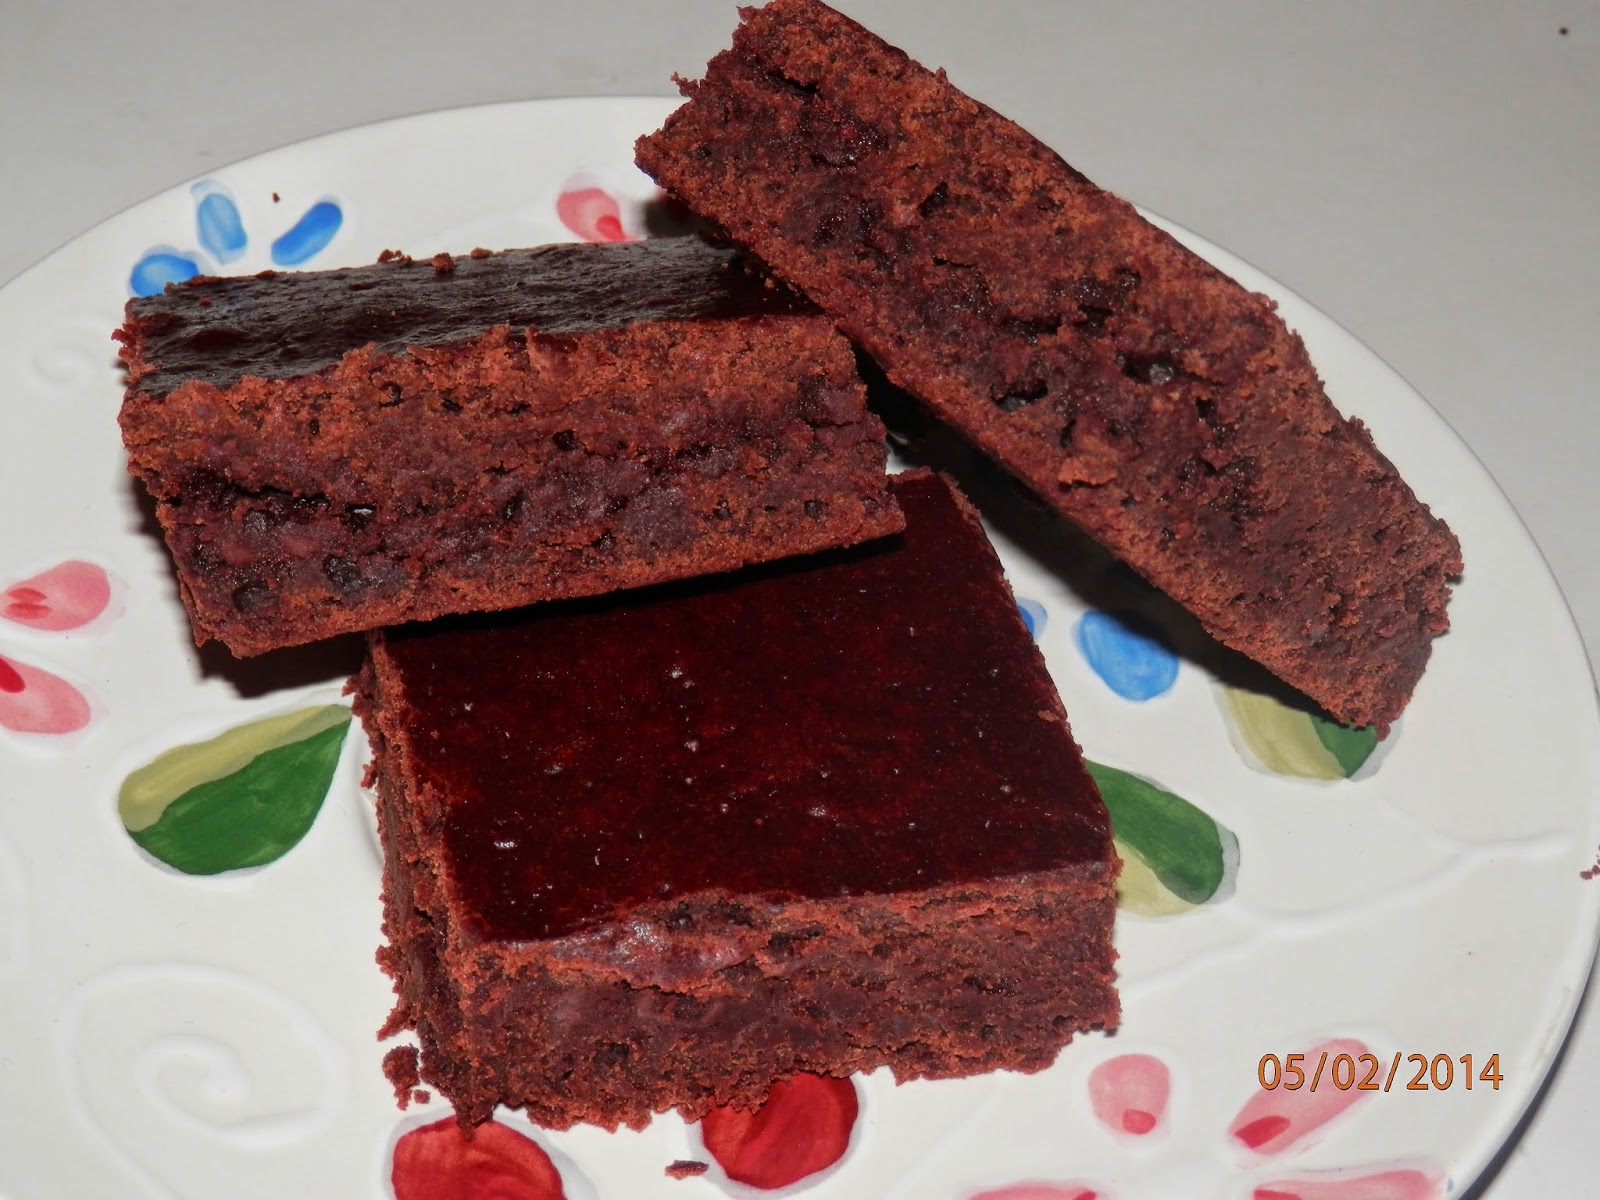
Egg Free, Dairy Free, Nut Free Perfect Brownies
We just had Jazlyn's Epi-Pen party. Every year when her Epi-Pen expires she picks the meal and dessert, her grandparents come over, and we have a fun night together. This year she wanted to make brownies. I've made many brownies before, but none of them were quite right. However, Jazlyn and I worked together on these brownies and they are absolutely perfect. They are moist, a little cakey, and so very good. Jazlyn wanted to add a layer of chocolate chips in the middle of them, which was a wonderful addition.
Perfect Brownies
2 cups flour
1 1/2 cups sugar
3/4 cup cocoa powder
1 tsp baking powder
1/2 tsp salt
1 cup water
1 cup unsweetened applesauce
1/4 cup oil
1 tbsp vanilla extract
1/4 - 1/2 cup safe chocolate chips, optional
Combine the flour, sugar, cocoa, baking powder, and salt. Add the applesauce, oil, and vanilla then mix until thoroughly combined. Spread half of the batter into a sprayed 9x13 baking dish. Sprinkle the chocolate chips evenly over the top. Spread the remaining half of the batter evenly over the chocolate chips. Bake at 350 for 30 minutes or until a toothpick inserted into the center comes out clean.
* If desired, you can omit the layer of chocolate chips.
* All of the ingredients can be halved then baked in an 8x8 baking dish.
Labels:
brownies,
chocolate chips,
cocoa,
dairy free,
dessert,
egg free,
nut free,
perfect brownies
Wednesday, May 28, 2014
Egg Free, Dairy Free, Nut Free Crock Pot Simple Cinnamon Rolls
I had a can of biscuits in the fridge that was about to expire so I came up with a super simple way of making cinnamon rolls in the crock pot. They are light and fluffy with the bottom coated with caramelized sugar. They are very good and make the house smell wonderful.
Crock Pot Simple Cinnamon Rolls
1 can safe refrigerated pop biscuits
1/2 cup dairy free margarine
1/2 cup brown sugar
1 tsp cinnamon
1 tsp vanilla extract
Melt the margarine then stir in the vanilla. In a separate bowl, combine the brown sugar and cinnamon. Roll a biscuit in the margarine to coat completely. Roll to evenly coat in the brown sugar and cinnamon mixture. Place in the sprayed crock pot. Cover with a paper towel then place on the lid. Cover then cook on low for 2-3 hours.
Subscribe to:
Posts (Atom)